
The Sucuri Firewall (WAF) is very easy to activate and takes less than 5 minutes! It runs in the cloud and doesn’t require any hardware or software installation on your end. All you need to do is a quick DNS change to re-route your traffic through our Anycast CDN Network.
How to set up the Sucuri Firewall (WAF)
1) Click here and add your site by clicking on Add Site in the top right hand corner.
2) Enter your site URL such as example.com and then click on Add this Site.
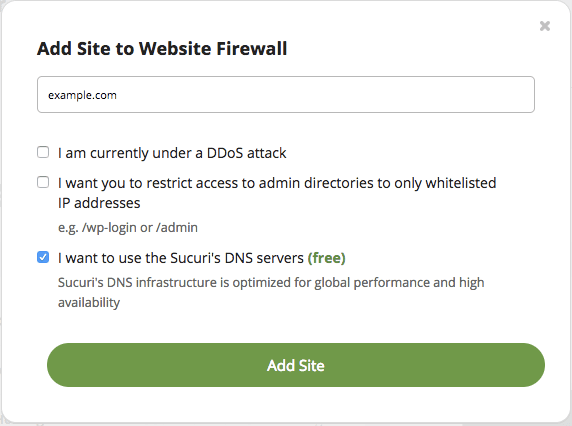
If your site is under a DDoS attack, you can select the first box. To restrict access to the admin pages to only whitelisted IP addresses, you can check the second box.
3) We offer a few different options to change your DNS in order to activate the firewall:
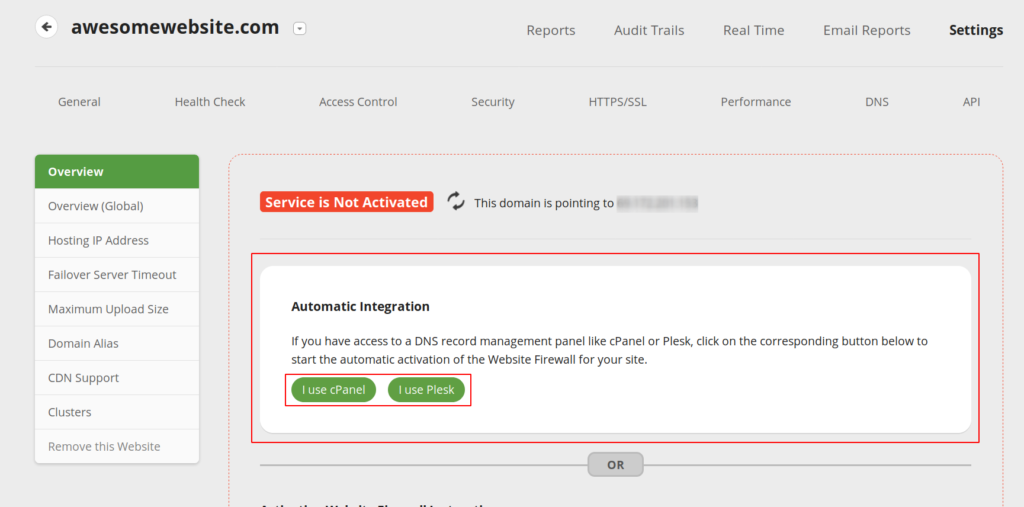
a) Automatic Integration with cPanel/Plesk
To activate the WAF using cPanel or Plesk:
- Click “I use cPanel” or “I use Plesk” button under Automatic Integration.
- Enter your domain, username, and password.
- Click the “Login to Plesk” or “Login to cPanel” buttons.
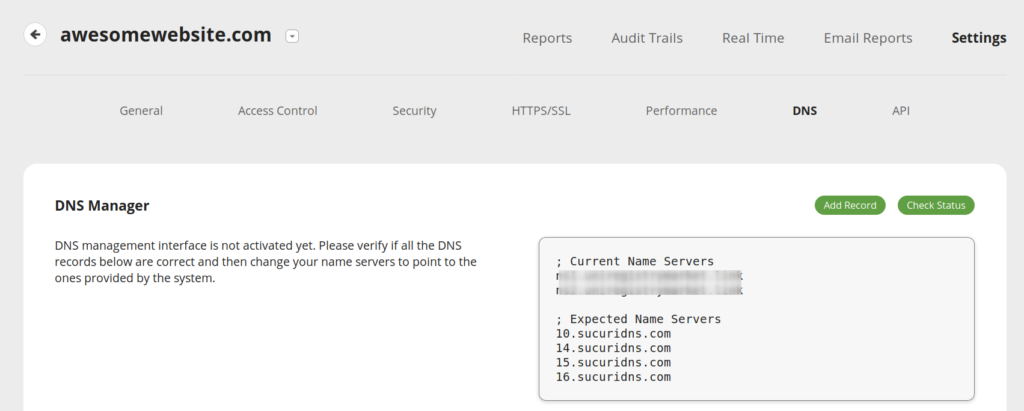
b) Use Sucuri DNS Manager
To use Sucuri DNS servers:
- If your site uses an SSL certificate (https), Sucuri Firewall will automatically issue a Let’s Encrypt SSL certificate within a few minutes of the site being live on our end.
- It is recommend that you upload the certificate and private key into the WAF before changing the DNS to avoid any SSL error messages while the Let’s Encrypt SSL issue process is running.
- If your domain is blacklisted by Google Safe Browsing, the Let’s Encrypt SSL issue process may not work, thus you will need to upload your current SSL certificate into the WAF or wait until the domain is removed from Google Safe Browsing blacklist to activate the WAF.
c) Manually Change DNS Records
To manually change your DNS records:
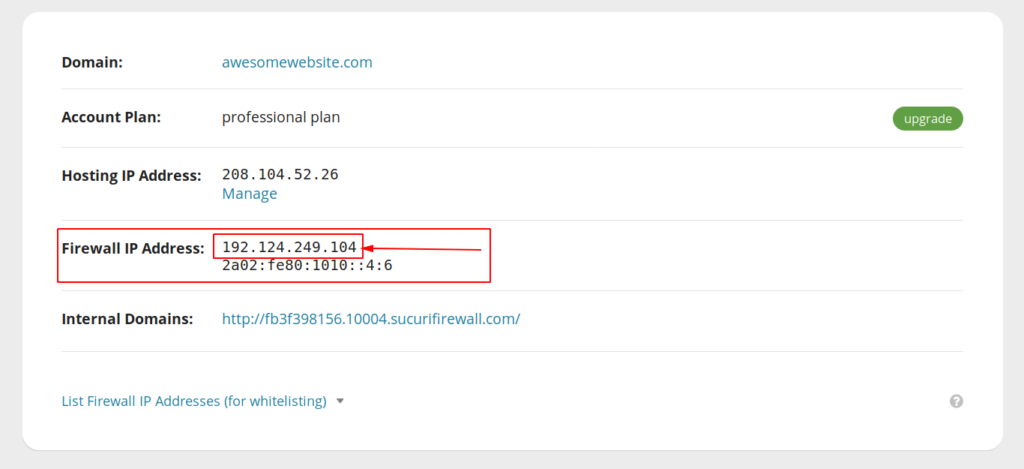
- Navigate to the main page of the WAF dashboard.
- Copy the the Firewall IP address, the one starting with “192.124.249.X”.
- Log into your host or registrar to access the DNS records for your domain.
We have instructions for several popular hosts in our Docs articles.
- Change the A Record as instructed in the grey box.
That’s it. It can up to 48 hours for DNS propagation. Until all DNS servers worldwide recognize that your website is pointing to the WAF IP address, you will not be fully protected.
SSL Certificates
If your site uses an SSL certificate (https), Sucuri Firewall will automatically issue a Let’s Encrypt SSL certificate within a few minutes of the site being live on our end. If you are on our Professional or Business plans, you can use your own custom SSL certificates and upload them on our dashboard.
And that’s it. Once the DNS change is done, your site will be protected by our Sucuri Firewall. If you do not feel comfortable changing your DNS settings, just open a ticket in our system and we will gladly do it for you!
NOTES:
- It is recommend that you upload the certificate and private key into the WAF before changing the DNS to avoid any SSL error messages while the Let’s Encrypt SSL issue process is running if you’re on the Professional or Business plan and already have a valid SSL certificate installed on your server.
- If your domain is blacklisted by Google Safe Browsing, the Let’s Encrypt SSL issue process may not work, thus you will need to upload your current SSL certificate into the WAF or wait until the domain is removed from Google Safe Browsing blacklist to activate the WAF.