
If you’re having trouble with our Website Application Firewall (WAF), don’t worry. It’s optimized for all types of websites, including those on a CMS or built with custom code. Proceed through the steps below and if you still have trouble, don’t hesitate to contact us.
Step 1: Is the WAF enabled?
It might sound odd, but we’ve received requests for firewall support only to find the WAF isn’t enabled. This is easy to confirm without accessing the Sucuri control panel using a tool such as ViewDNS. Make sure the IP addresses fall somewhere in the range of 192.124.249.x, and be sure to check the www. of your domain.
However if you are not using Sucuri nameservers just make sure that you verify that the IP address matches the IP located in the Sucuri account under that firewall.
Step 2: Is your Sucuri SSL configured?
Your Sucuri SSL should be configured in one of two ways:
Via Sucuri/GoDaddy: This is an automated process. The system generates an SSL for you automatically. However, this process happens after the DNS change, which causes a brief interruption of functionality in the website (typically about 15 minutes) as GoDaddy requires that time to generate and validate the certificate.
It isn’t possible to use the GoDaddy SSL without experiencing a bit of downtime during the initial setup via this method. This is because the SSL generation and verification is not immediate, and cannot be completed before the DNS has been pointed to the Sucuri firewall without additional steps.
Propagation time may cause these results to fluctuate depending on server-side and DNS caching/propagation. After a few hours, the SSL will be completely functional automatically on the domain.
Uploading a custom SSL is the only way to avoid this window of downtime. It does mean that you would need to manually renew the SSL in the future, whereas we can take care of this for you with no risk of downtime if you’re using ours.
Via Upload: This is the most straightforward approach if you already have an SSL certificate. Just upload the SSL certificate to our system prior to the DNS change here. This way, once the DNS cutover is live, the browser will also see the certificate you have on the host server avoiding all types of issues.
Step 3: Are you getting errors?
Our WAF will rarely produce errors but verifying the error you see is typically quick and straightforward. Look below to find any errors you’re seeing, and then try the suggested next steps.
404 Errors
This means the whole site could be affected. Make sure you have the correct host IP/cname set as origin. If the 404 you’re seeing is Sucuri branded, make sure your DNS A records are pointing to the correct Sucuri WAF IP.
Also check to see if it’s just a single page or item that’s affected. If so, replace the missing resource or remove the reference to it in the site code. 404 errors may appear as broken pages caused by missing elements such as CSS with no other error. You can identify missing resources and its reference with a tool like WebPageTest (look in the waterfall tab).
302 Errors
Redirect loops are usually identified with an error in the browser. While the WAF won’t be the cause of these, you could be caching a loop from the host. Changing to site caching might help. If you have HTTPs only site set in your SSL tab, this could be conflicting with our 301 redirect, so try disabling it. If you are redirecting your http address to https, it is preferable to use HTTPs only site, if possible.
401 Errors
These are messages from the host indicating you are required to log in to see this resource. You normally see these when accessing a page that you would normally need to be logged in to view.
500 & 501 Errors
These are typically accompanied by an Internal Server message. They will always originate on the hosting server and are usually related to some misconfiguration. Checking the host’s error logs should provide a cause.
502 Errors
These will be Sucuri branded and are normally caused by a firewall on the hosting server blocking the WAF IPs. Check our IP ranges:
192.88.134.0/23
185.93.228.0/22
66.248.200.0/22
2a02:fe80::/29
208.109.0.0/22
These should be whitelisted on the host and not subject to any rate limiting. If you are still unable to find the cause, open up a support ticket to request the error logs from Sucuri so you can verify them with the host’s error logs to find the cause.
503 Errors
These are due to resource issues, misconfigurations or database errors. Check the host’s access and error logs to find a cause. Also note, this also could be due to abnormal load, either legitimate (which the access logs would confirm) or due to a DDoS attack, in which case you should contact Sucuri immediately.
504 Errors
Similar to the 502 errors above, these will be Sucuri branded. And like 502 errors, these can be caused by a firewall on the hosting server blocking the WAF IPs. Make sure our IP ranges are whitelisted, as with the 502 errors. However, more often 504s are caused by the host failing to respond to a request within 60 seconds. If you are unable to find the cause, request the error logs from Sucuri and verify them with the host’s error logs to find the cause. Find more useful advice on troubleshooting response timeout errors here.
Step 4: Are you getting blocks?
Blocked messages are branded and display content. Find the block ID here.
If you need help troubleshooting and resolving these issues, It’s important to give our team the entire text content of the message (select all, copy, and paste). It’s also useful to know the context of the issues, such as who’s affected, their IP address (which can be found here) and how to replicate the issue. If there isn’t a block message, a screenshot and the IP address can be provided in its place.
Step 5: Are you having caching issues?
These issues are fairly tricky to identify. It’s when content looks like it should’ve updated, or it’s wrong for the device/browser you’re using to view it. For example, it could be you’re seeing public content when you’re really logged in to a private account. It’s best to bring these to Sucuri’s attention by creating a ticket and providing as much detail as possible, including the page where you see the issue. We can also cache some bad behavior from the website code on the host. These could include a 302 redirect loop or even a 404 error. The cache can be cleared using one of the methods described below.
5.1 Clearing the Sucuri Firewall Cache
There are a few ways you can clear the Sucuri Firewall cache:
Dashboard Cache Options
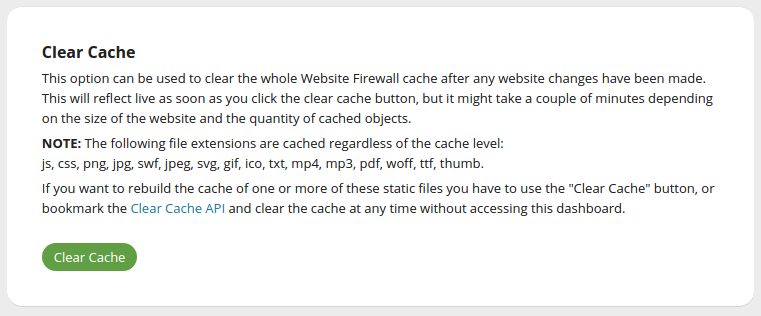
To clear all page and file cache at once, go to Performance ,and from Clear Cache – Global, click Clear Cache.
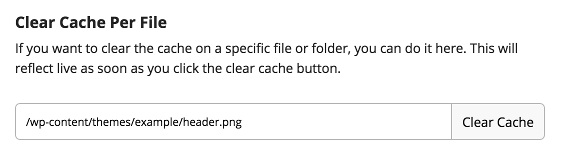
To clear the cache for individual pages or files, go to Performance, and from Clear Cache – Per File, enter the file URL you wish to clear, and then click Clear Cache.
API Cache Options
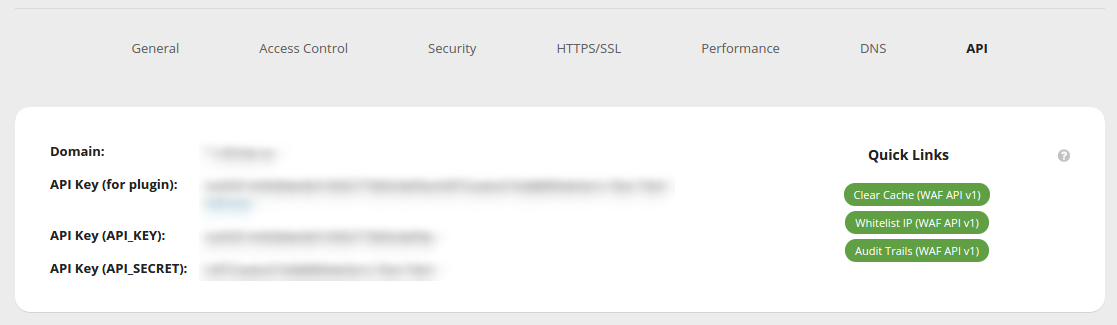
If you’d like a faster way to clear your site cache, you can also use the Website Firewall API. Log into the Website Firewall dashboard, go to API, and then click API Details. There you will see a Clear Cache (Website Firewall API v1) button. Click it, and you will clear the cache using the Website Firewall API.
You can bookmark the page so that any time you want to clear the cache you simply have to visit the bookmarked page.
Each site does have their own unique API key. If you require a large list of clear-cache APIs for your domain inventory, notify your account rep who can retrieve that list for you.
5.2 About Caching Modes
We operate our own Global CDN so there is some level of caching being performed on your websites. Let’s review the current cache options available to you. You can see them all under Performance > Caching Level in Sucuri Firewall’s settings, also found here:
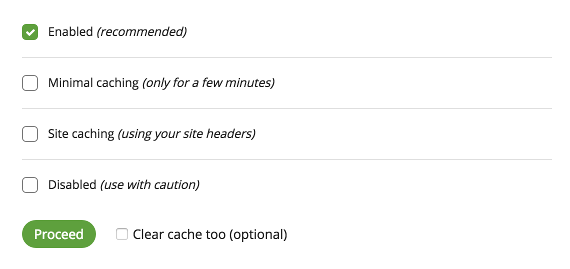
Here is what each option means:
Enabled (recommended) – Enabled (selected by default) will cache your pages and redirects for 180 minutes and 404 for 4 minutes. This is the best option when it comes to site performance, but the sessions may also get cached if you have login capabilities on the site. Cached sessions would be the reason Customer B logs into their account only to see the account information of Customer A, who logged in first.
Minimal caching (only for a few minutes) – Minimal will cache your pages for 8 minutes, redirects for 15 minutes, and 404 for 2 minutes. This is the best option when you need to make constant updates to your site, such as newspapers or blogs.
Site caching (using your site headers) – Site Caching won’t cache page content for logged-in users. It redirects for 3 hours and 404 for 4 minutes. This is the best option if you run a custom CMS, a forum like vBulletin, or an ecommerce store. Cache headers sent by your application/server will be respected, so if your application doesn’t send the “no-cache” headers it may cache your page content.
Disabled (use with caution) – Disabled won’t cache page content for logged-in users, redirects for 10 minutes, and 404 for 1 minute — but note that it can slow down your site. Cache headers sent by your application will be respected, so if your application doesn’t send the “no-cache” headers it may cache your pages content.
Important Note: Regardless of the caching level you chose, the Sucuri Firewall will continue to cache static files such as images, .swf, .css, .js, .pdf, .txt, .mp3, .mp4 and fonts. If your web servers instructs otherwise, like “Cache-Control: public, max-age=XXX” the Firewall will follow the instruction and cache for that XXX seconds.
Step 6: Is there just a blank screen?
Whitelisted IPs are not blocked by the IDS unless something very bad is being caused by the user on the host, such as too many 50x errors.
These IDS blocks last 20 minutes. If they return or persist, get your IP address here so we can confirm the cause and address the underlying issue.
There are two possibilities here:
- Our IDS (Intrusion Detection System) is blocking you.
You or someone sharing your IP address have triggered the IDS with too many prohibited actions, such as multiple 30x, 40x or 50x in a short period of time, or 20 failed login attempts in a few minutes. Normally, the browser would’ve seen these previous errors and ignored them. - Another cause of white screens are often known as the “white screen of death.”
These are 500 internal server errors, and the host’s error logs can usually confirm the cause. These can be identified using developer tools such as Chrome Inspector.
Step 7: Are attackers able to bypass the WAF?
The best way to prevent hackers from bypassing our Firewall is by limiting their direct access to your origin server. To do this, add restrictions to your .htaccess file so that only our Firewall’s IP will be able to access your web server.
However, before you do this, make sure your DNS changes are fully propagated, as you may block valid visitors whose DNS has old information. Four hours is usually enough.
Review the proper server for your hosting configuration and add the code for Apache in your .htaccess file. For Nginx, you will need to add it to your Nginx configuration file.
Apache 2.4 Server
    <FilesMatch ".*">
        Require ip 192.88.134.0/23
        Require ip 185.93.228.0/22
        Require ip 2a02:fe80::/29
        Require ip 66.248.200.0/22
        Require ip 208.109.0.0/22
    </FilesMatch>
Apache 2.2 Server
    <FilesMatch ".*">
        Order deny,allow
        Deny from all
        Allow from 192.88.134.0/23
        Allow from 185.93.228.0/22
        Allow from 2a02:fe80::/29
        Allow from 66.248.200.0/22
    </FilesMatch>
Nginx Server
    location / {
        allow 192.88.134.0/23;
        allow 185.93.228.0/22;
        allow 2a02:fe80::/29;
        allow 66.248.200.0/22;
        allow 208.109.0.0/22;
        deny all;
        # Existing NGINX rules
}
7.1 Bypassing the WAF for Testing with the Hosts File
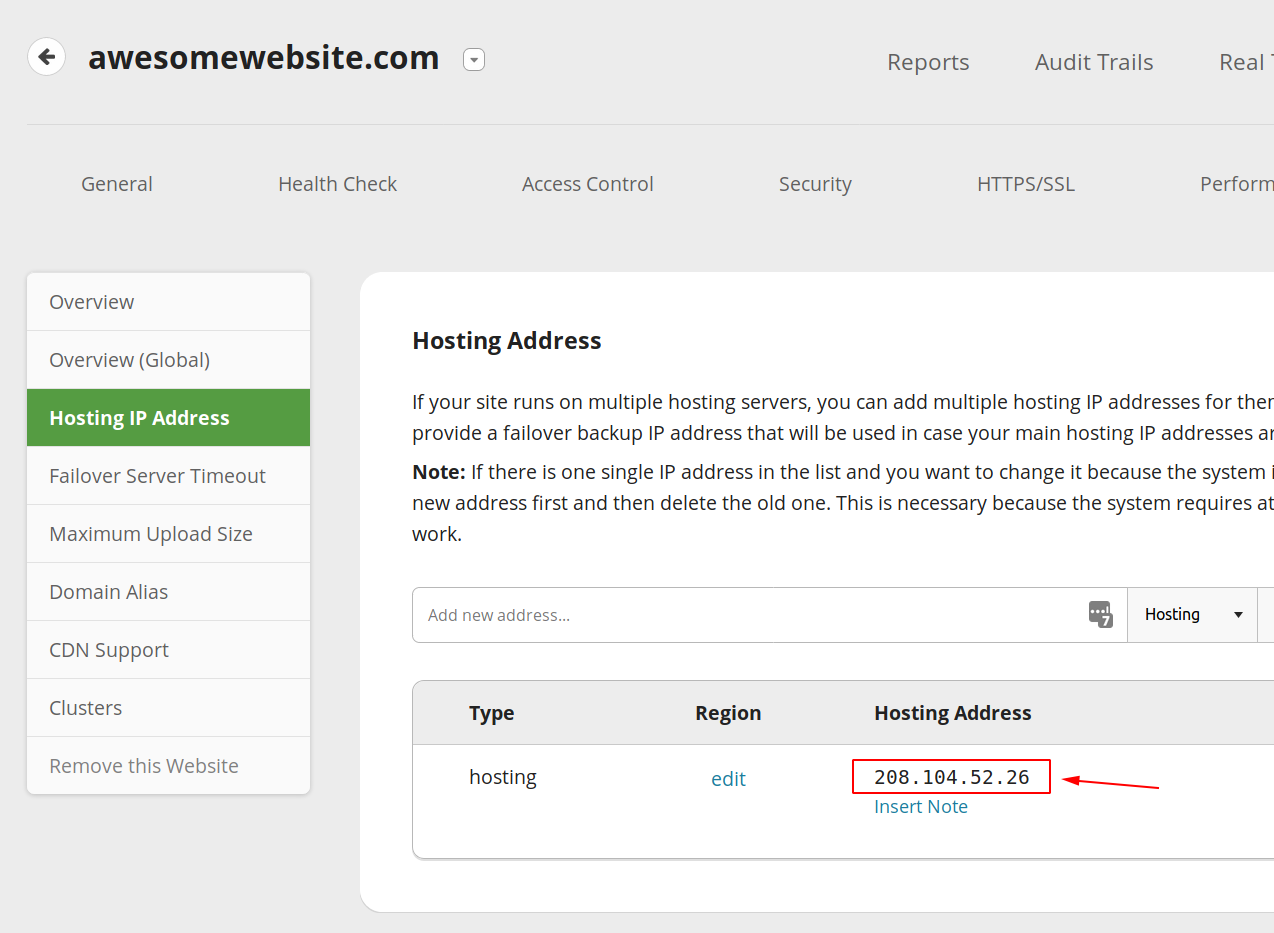
First, you must find and copy your hosting IP address by accessing the Hosting IP Address page of the WAF dashboard here.
The next steps depends on your operating system, but we cover them all here.
7.2 Handling 403 Errors when Bypassing
If you’ve implemented Firewall Bypass Prevention, you need to add your own IP to the FileMatch directive:
<FilesMatch ".*">
    Order deny,allow
    Deny from all
    Allow from 192.88.134.0/23
    Allow from 185.93.228.0/22
    Allow from 66.248.200.0/22
    Allow from 208.109.0.0/22
    Allow from 2a02:fe80::/29
    Allow from INSERT YOUR IP HERE
</FilesMatch>
If you are still having troubles or have questions, please open up a support ticket if you have not done so already. Then come to chat with our team at https://sucuri.net/live-chat/ and we’ll be happy to take a look.