
If you are using Ezoic (an artificial intelligence platform for publishers) and want to add our Website Firewall protection to your website, this guide will help you get that configured.
1) Enable the CDN Support option on the Sucuri Firewall dashboard setting it to Other.
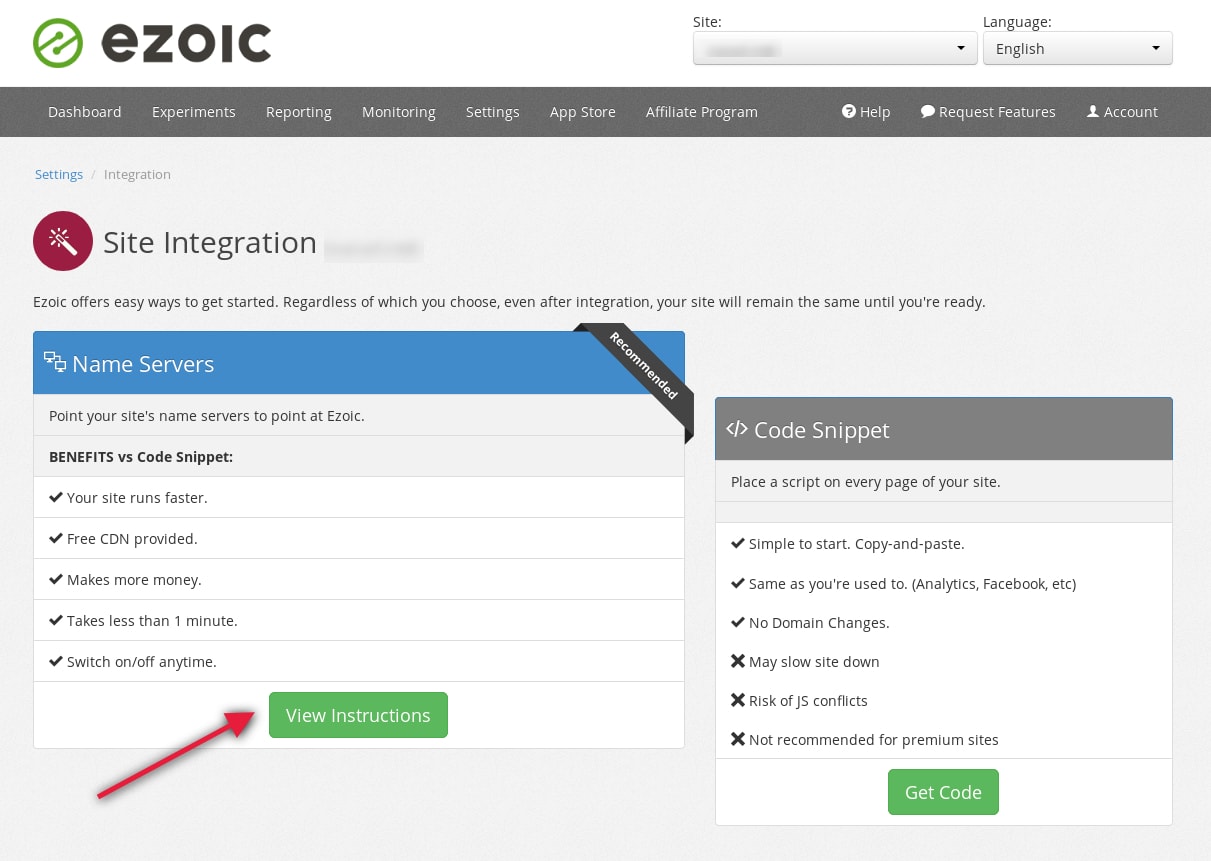
2) At Settings -> Integration of Ezoic dashboard, choose “Name Servers” by clicking on View Instructions button.
3) Change the name servers (DNS) to the ones Ezoic provided for your domain.
4) Copy all DNS records from your current DNS zone to Ezoic. You can access the DNS manager of Ezoic on the Manage my DNS records link right below the “Change your name servers with your DNS provider” section OR by acessing Ezoic’s Settings page -> Advanced -> “Server” section -> DNS Settings option.
5) If there are no records yet, click on the Add DNS Record button and fill it in with the following information:
DNS Record Type: A - IPv4 address
Name: @
Value: IP ADDRESS OF THE FIREWALL (Would be something like 192.124.249.16, you can get your Firewall IP address on the [General tab](https://waf.sucuri.net/?settings) of Sucuri Firewall.)
Time to Live (TTL): 90 seconds
If there is an @ record already, change its value to the Firewall IP address.
6) Repeat the process, but now instead of using “@” for “Name”, type “www” or any other sub-domain that your website is using the Sucuri Firewall.
7) Back to Ezoic’s Settings page, go to Turn Ezoic On & Off and enable it according to your objectives.