
In the early Internet age, operating systems used to use the hosts file to resolve hostnames to IP addresses until public DNS servers were commonplace.
Operating systems continue to allow you to edit the hosts file manually in order to bypass regular DNS resolutions to resolve a host name to an IP address of your choice.
This is especially useful for testing or development purposes. In this article, we’ll cover how to access your hosting server without the WAF in the middle of the connection. In fact, it is simpler than it sounds.
Editing the ‘hosts’ file
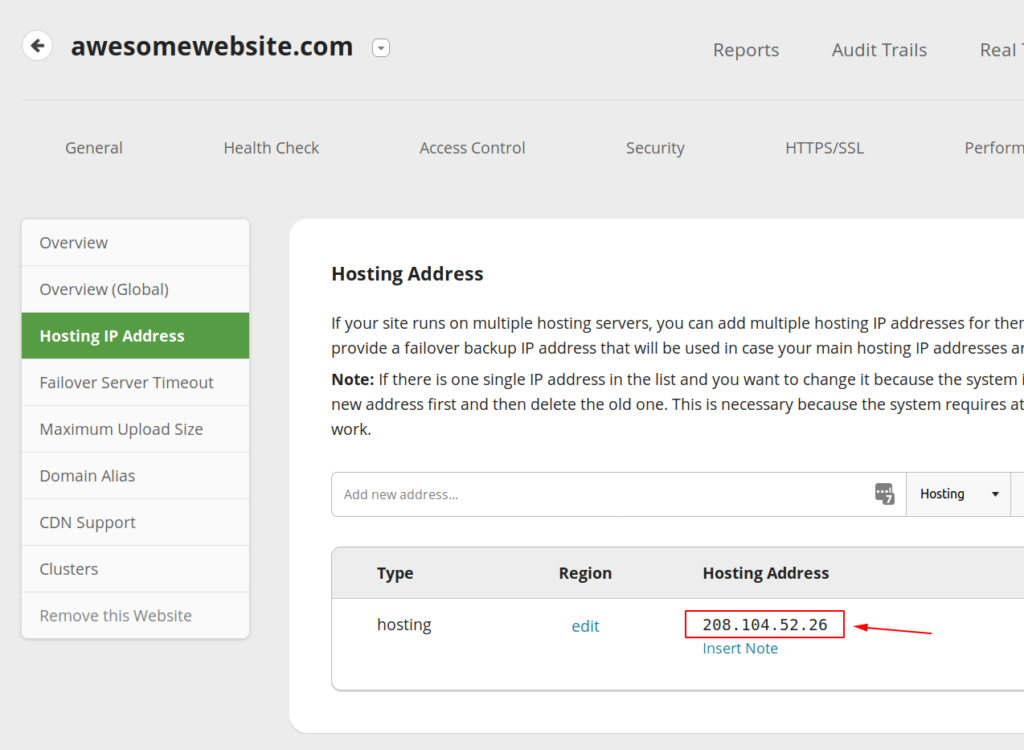
First, you must find and copy your hosting IP address by accessing the Hosting IP Address page of the WAF dashboard.
The next steps depends on your operational system, but we will cover all of them.
Microsoft® Windows
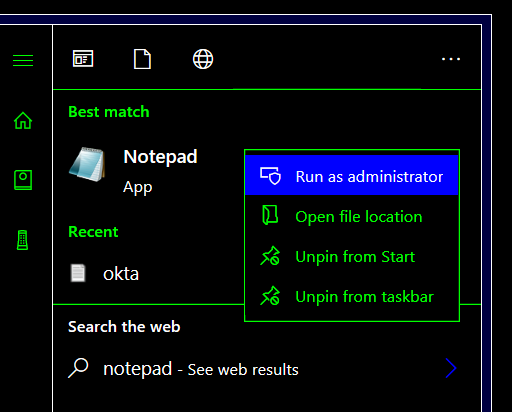
1) Press the Windows key, search for "notepad", right-click on Notepad and select the option Run as administrator.
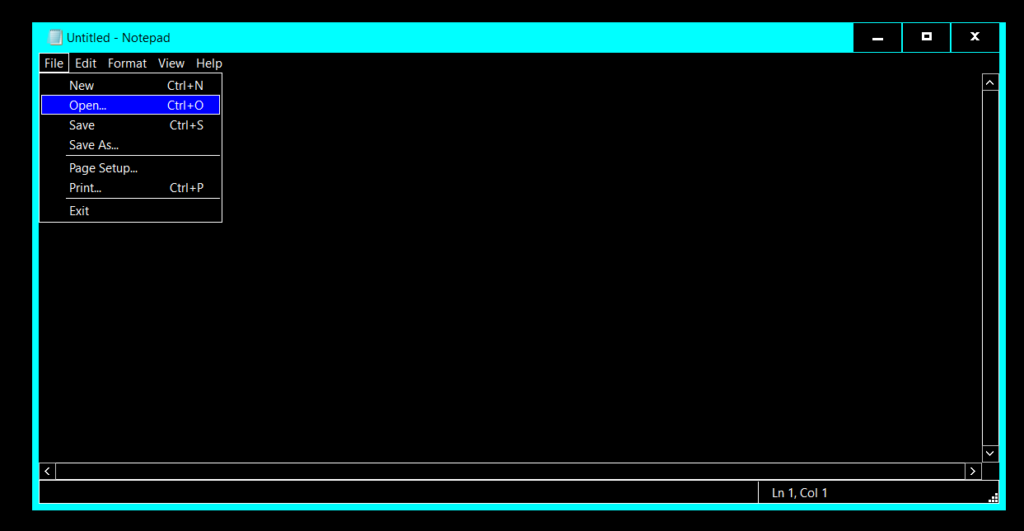
2) Once the Notepad is open, go to File -> Open and type c:\windows\system32\drivers\etc on the path field. The "c:\" disk could be another letter, just make sure you’re acessing the primary disk of your system, which is usually where your Windows was installed.
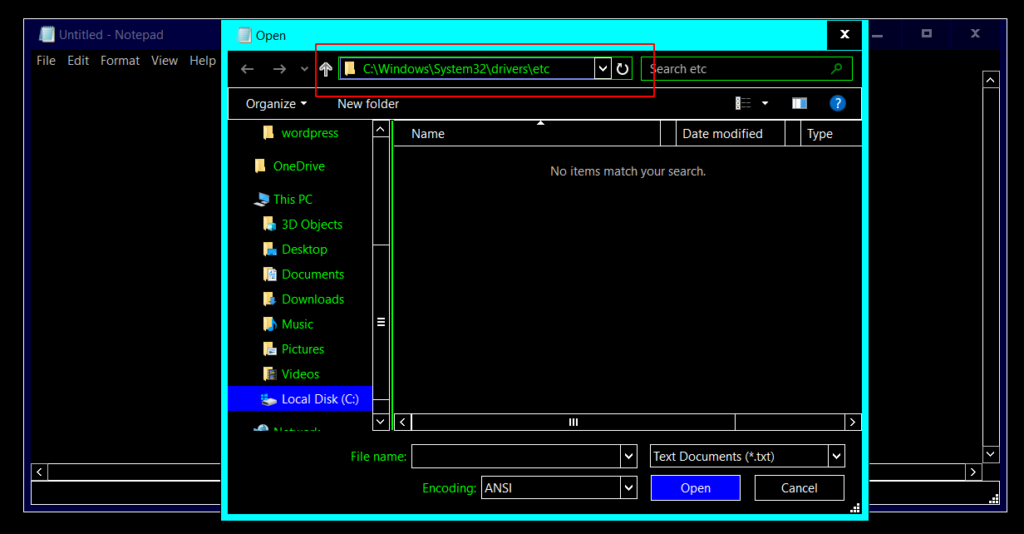
3) The ‘hosts’ file won’t show right away because Notepad usually lists only text files, so you need to select "All Files" on the bottom of the window.
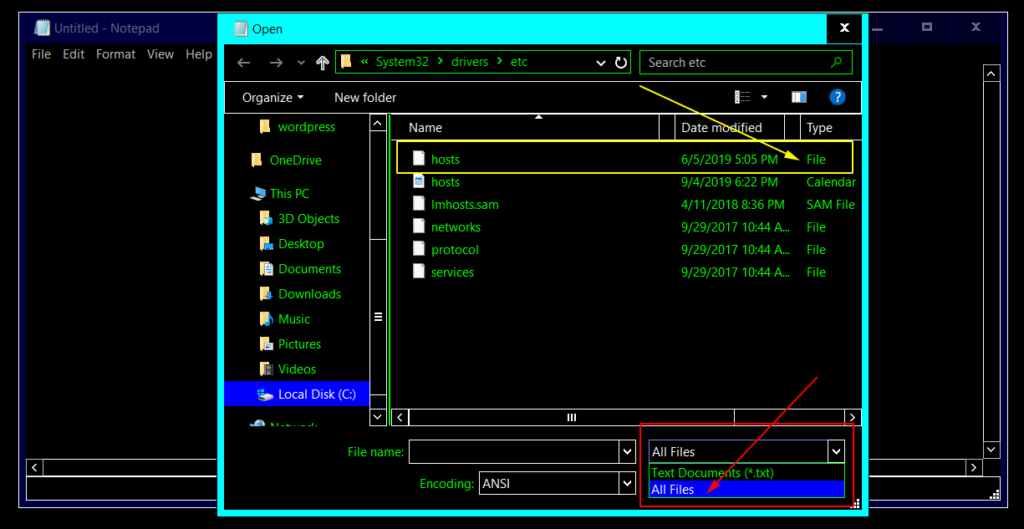
Make sure you click on the ‘hosts’ file that shows as "File" on the Type column as there are two files named "hosts".
4) Inside the file, at the very end, add a line following this structure:
208.104.52.26 www.awesomewebsite.com awesomewebsite.com5) Replace awesomewebsite.com with your domain and 208.104.52.26 with your hosting IP.
6) Save the file and exit Notepad.

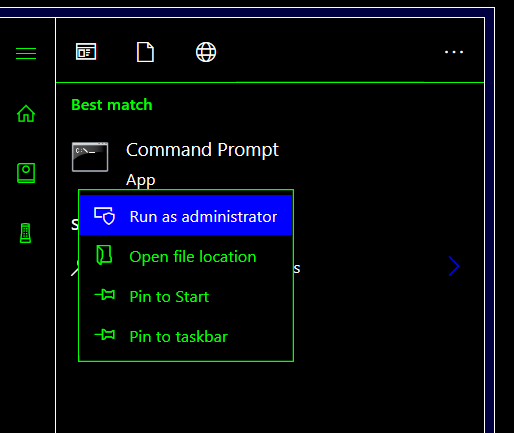
7) Just like you did before to run Notepad as administrator, now search for cmd.exe on the Start Menu, right-click select the option Run as administrator.
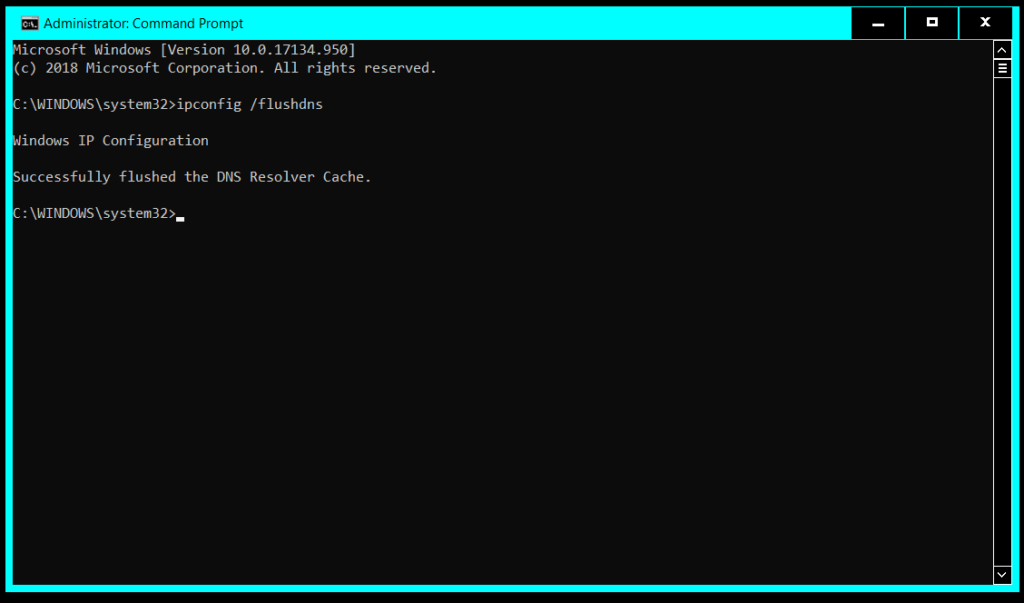
8) Type "ipconfig /flushdns" on the command prompt window and press "Enter" so the changes takes effect. After doing this you can close the command prompt window.
macOS, Linux or any Unix-like system
1) Open the Terminal.
On macOS, you can search on Spotlight or find the Terminal at Applications -> Utilities folder.

Because Linux has many distributions with different interfaces, there are numerous ways to find Terminal. If you are running a distro similar to Ubuntu, press "Ctlr + Alt + T" and you are likely to open the Terminal this way. To be sure, research how to open a Terminal window in your distribution’s documentation.
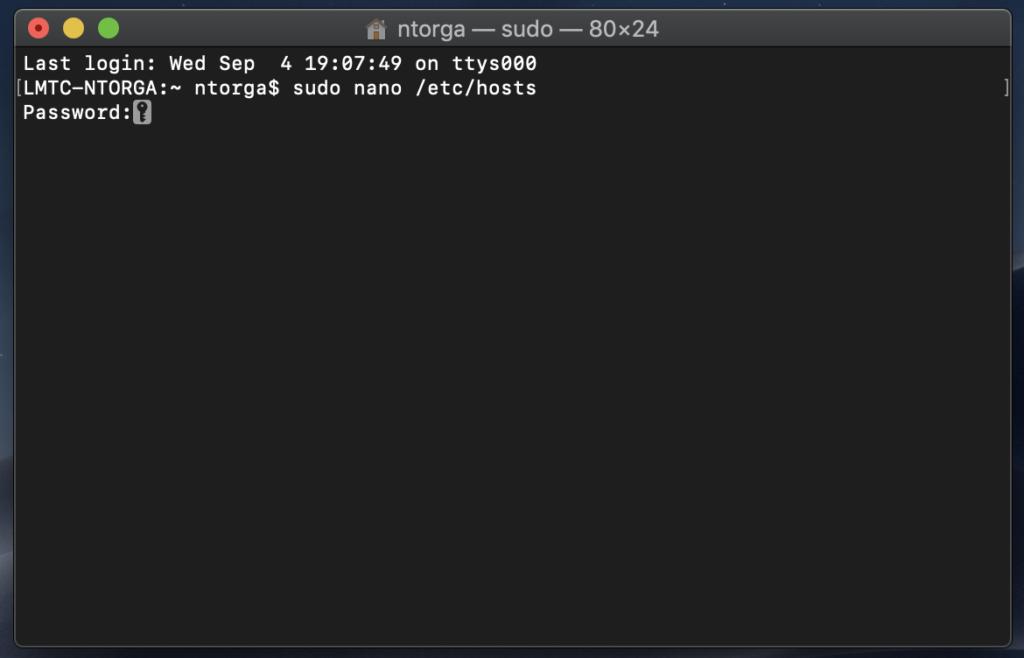
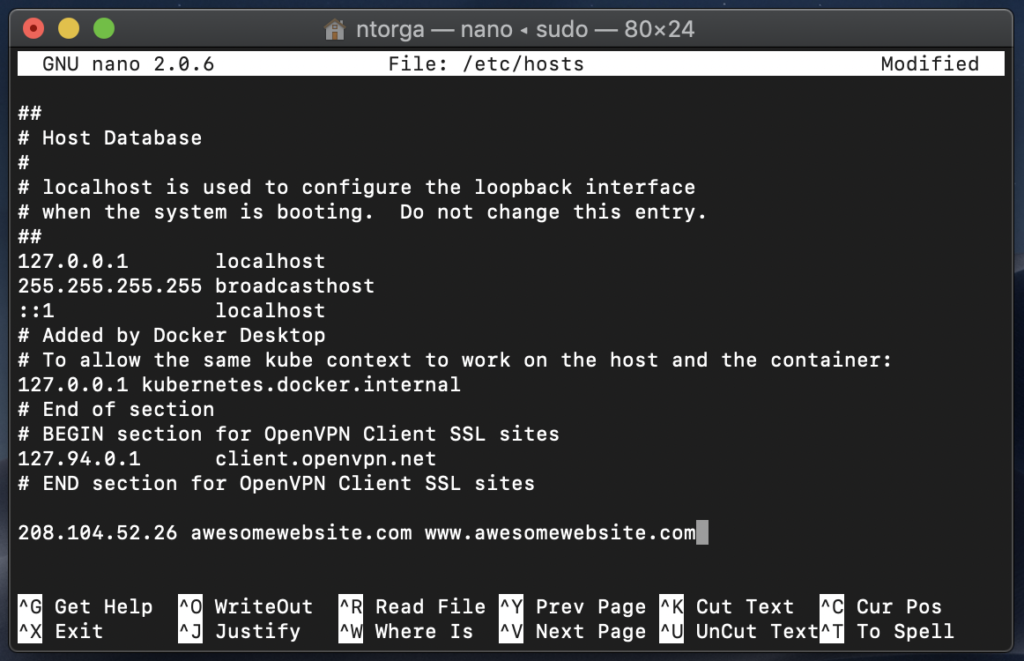
2) Type sudo nano /etc/hosts on the Terminal window and your password so you can open Nano Text Editor as root.
If you see Command 'nano' not found message, your Linux distribution may not have Nano Text Editor installed, therefore you can either choose a different editor such as Vim, Gedit, etc… You can also install Nano with your distribution package manager. If you are running a distro similar to Ubuntu, run the command sudo apt install nano on Terminal to install Nano Text Editor.
3) Inside the file, at the very end, add a line following this structure:
208.104.52.26 www.awesomewebsite.com awesomewebsite.com4) Replace awesomewebsite.com with your domain and 208.104.52.26 with your hosting IP.
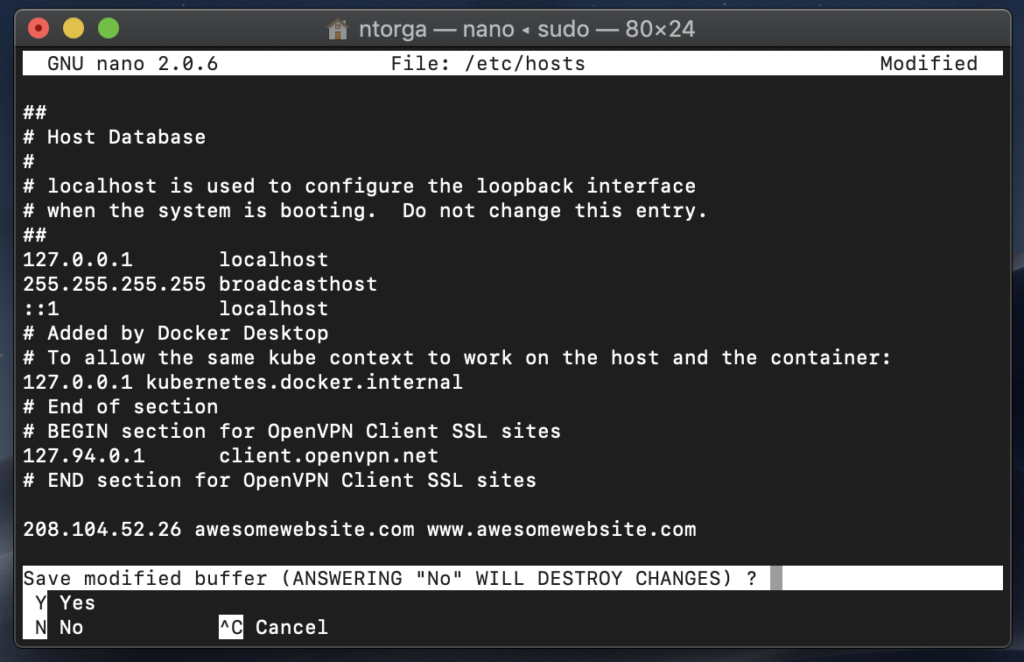
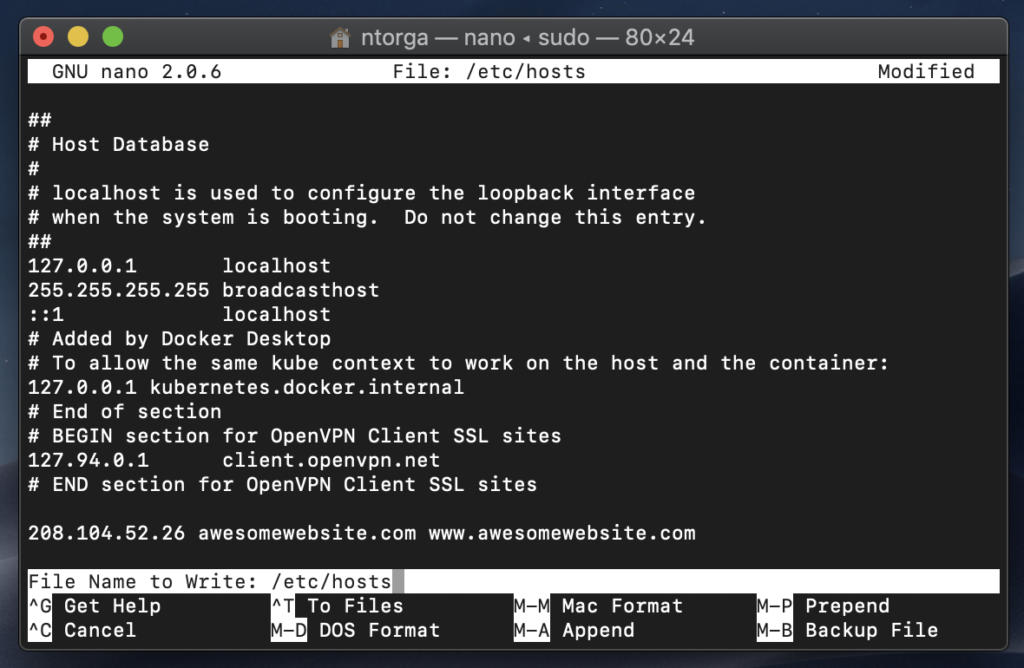
5) Press "Ctrl + X", then "Y" and then "Enter" to confirm saving the file with the same name.
That’s it. You should be able to view your website directly from your hosting server. Please, use the incognito mode of the browser to make sure it didn’t cached the DNS.
Troubleshooting
403 Error When Bypassing
If you’ve implemented Firewall Bypass Prevention, then you will need to add your own IP address (which can be found here to the FileMatch directive:
# BEGIN Sucuri Firewall Bypass Prevention
<FilesMatch ".*">
    Order deny,allow
    Deny from all
    Allow from 192.88.134.0/23
    Allow from 185.93.228.0/22
    Allow from 66.248.200.0/22
    Allow from 208.109.0.0/22
    Allow from 2a02:fe80::/29
    Allow from INSERT YOUR IP HERE
</FilesMatch>
# END Sucuri Firewall Bypass Prevention