
If you have issues configuring the Server Side Scanner, you can download your scan verification file from the dashboard and upload it to your site.
Log into your Sucuri account. Click on your site, and navigate to Settings>Server Side Scanner.
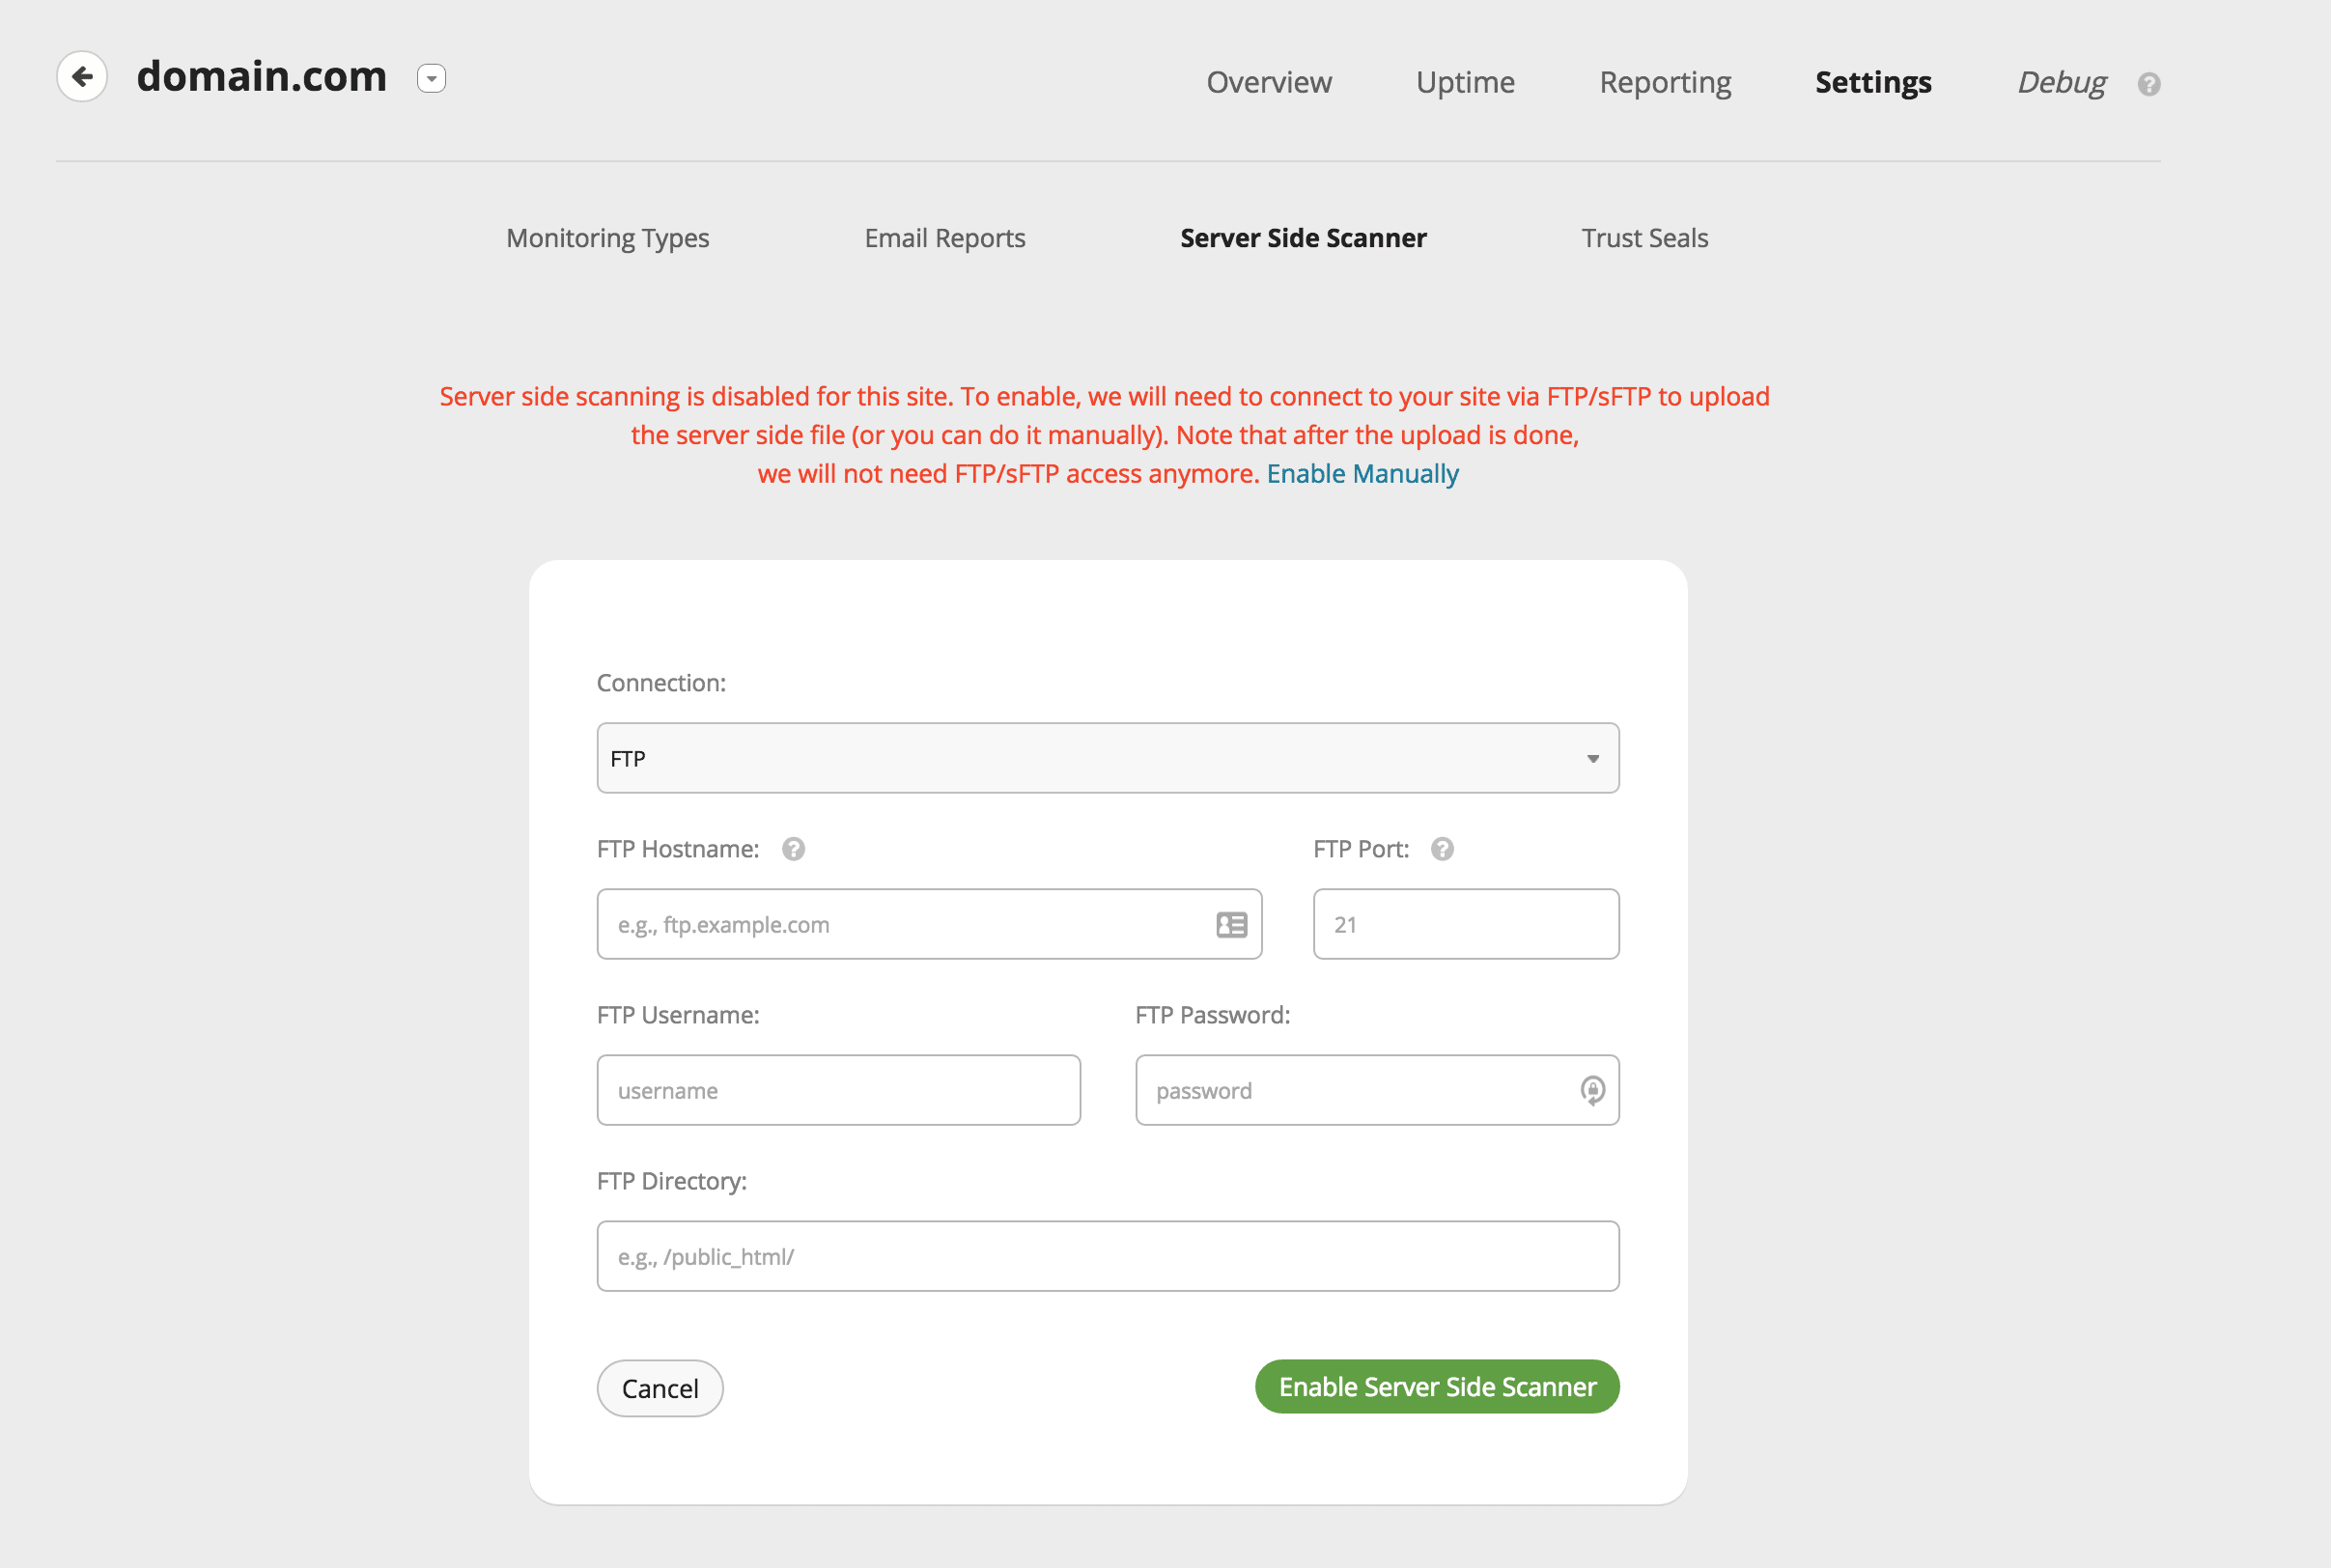
Click the “Enable Manually” link (in blue), which will bring up this page:
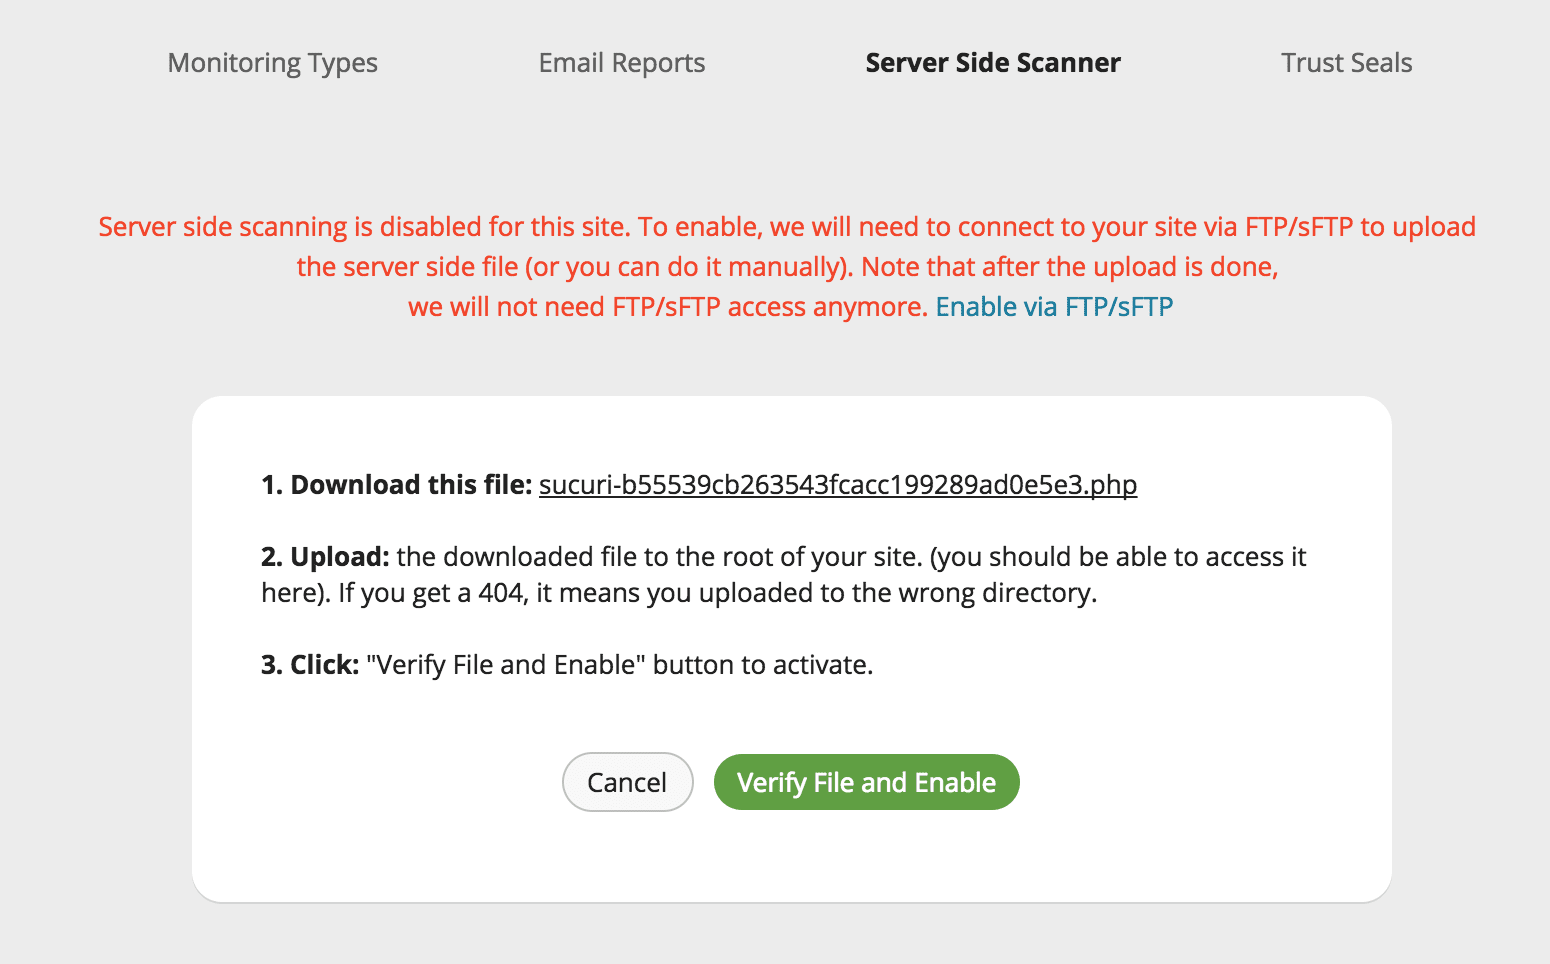
Click the link to download the Sucuri PHP file to your computer.
Use your favorite S/FTP client to connect to your server and upload the file to the home directory of your website. For security reasons, we recommend using SFTP rather than FTP.
Alternatively, you can also use the File Manager found in your hosting control panel to upload the file.
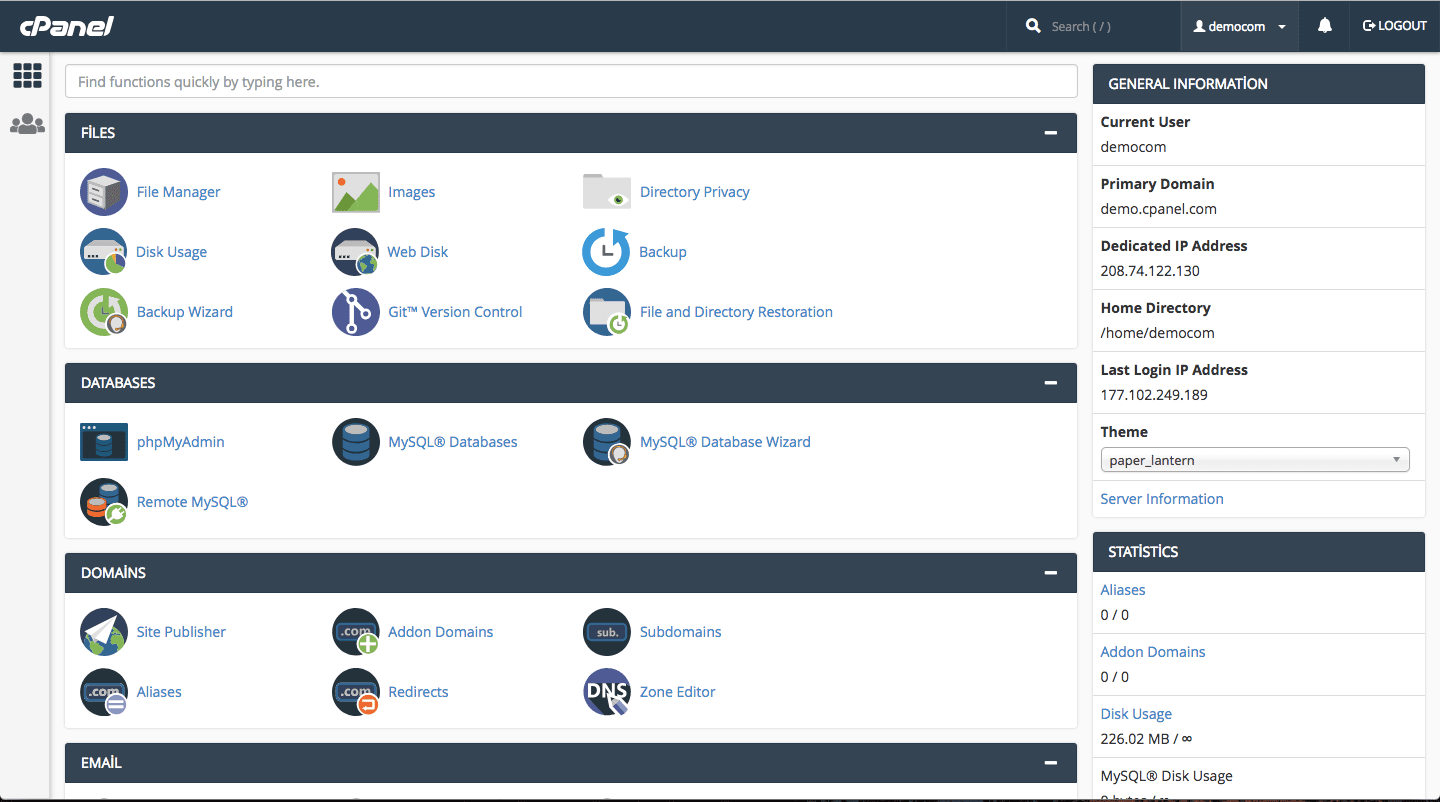
Upload the Sucuri PHP File with cPanel
Log in to your cPanel dashboard. Navigate to Files > File Manager. You can see an example in the image below.
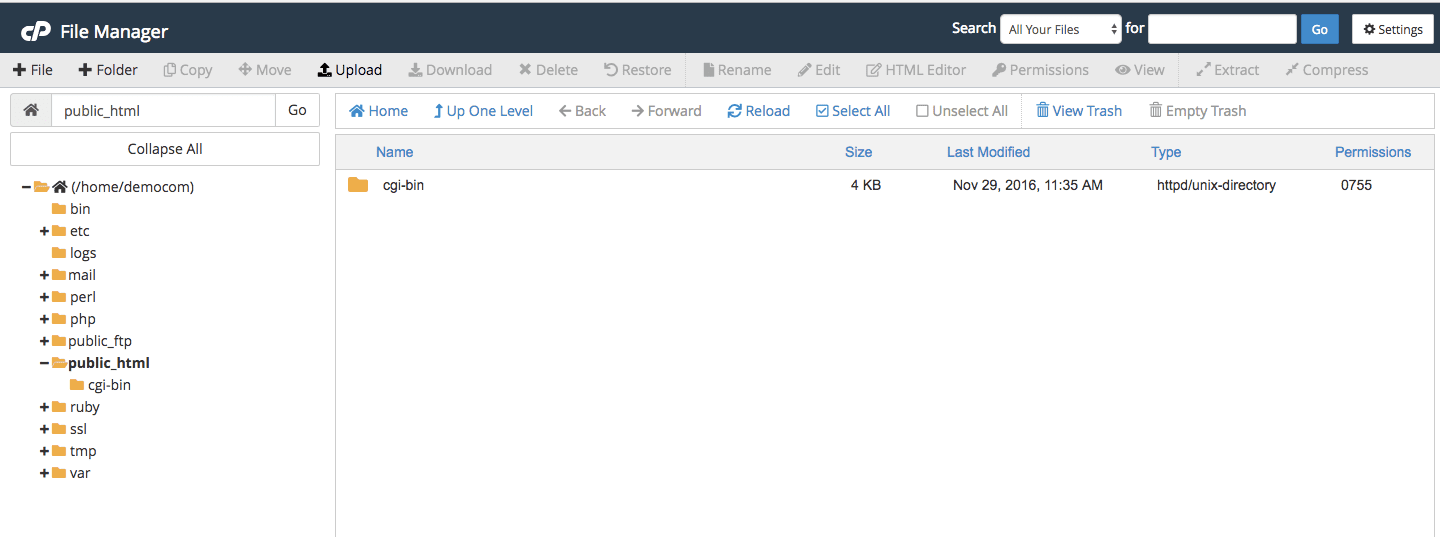
By default, cPanel sets the public_html folder as the Document Root directory for all domains. If you have multiple domains, you need to navigate through the folders until you reach the root directory of the website you want to configure for server-side malware scanning.
Once you are in the root directory of your site, you can click on the Upload button of the File Manager window to upload the Sucuri PHP file. See the example in the image below:
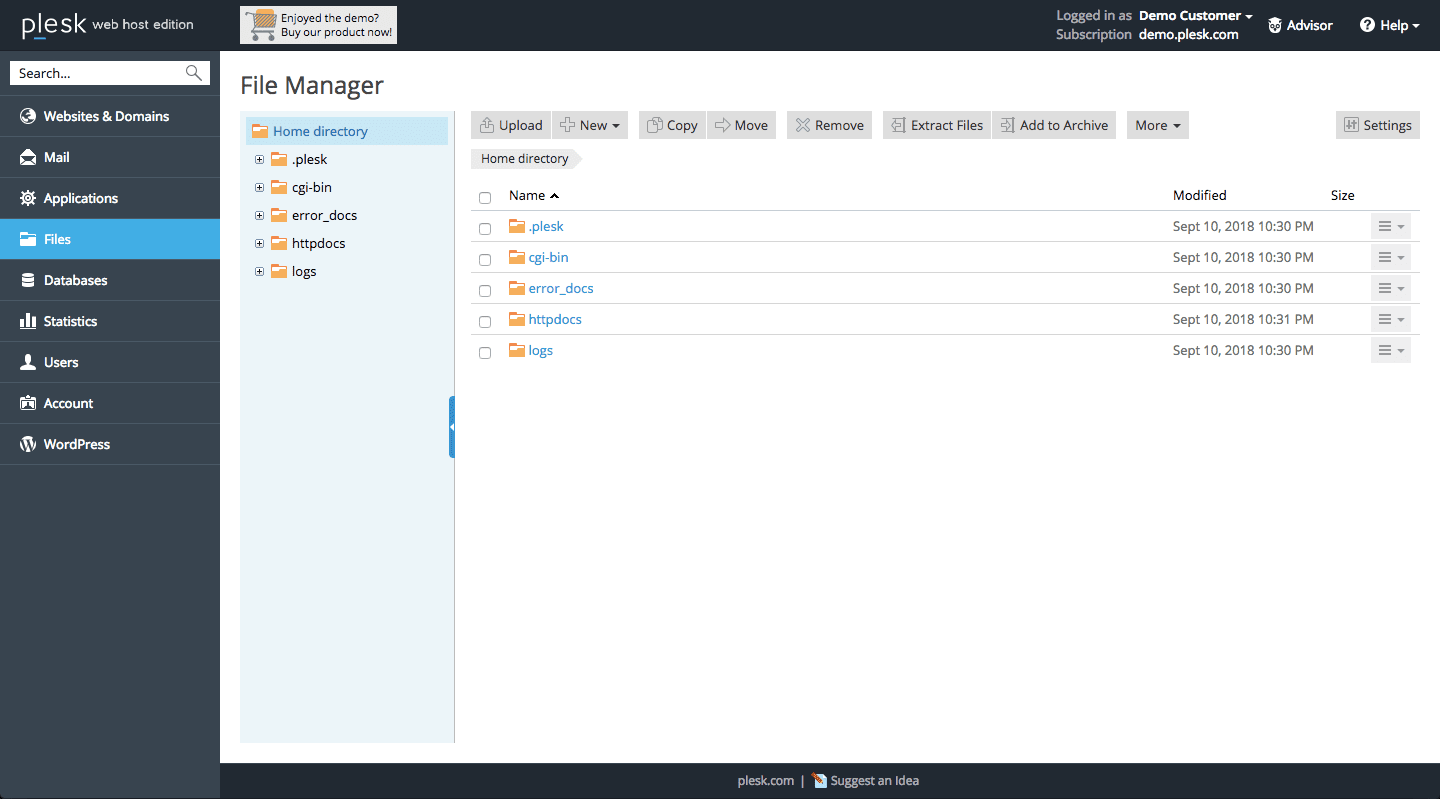
Upload the Sucuri PHP File with Plesk
Log in to your Plesk admin panel, click on the Files section in the left side navigation as shown in the image below:
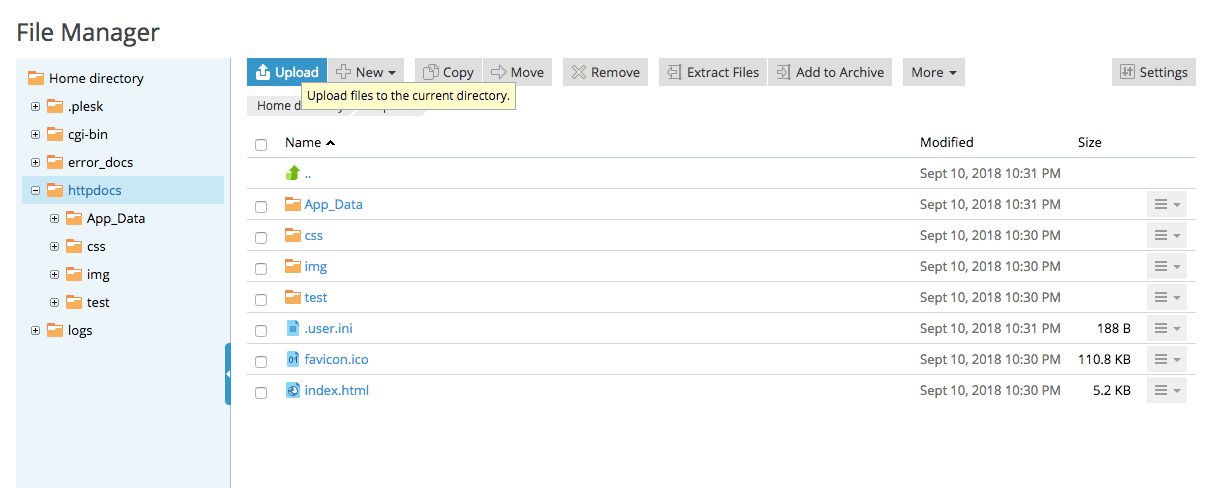
By default, Plesk sets the httpdocs folder as the Document Root directory for all domains. If you have multiple domains, you need to navigate through the folders until you reach the root directory of the website you want to configure for server-side malware scanning.
Once you are in the root directory of your site, you can click on the Upload button of the File Manager window to upload the Sucuri PHP file. See the example in the image below:
Go Back to the Sucuri Dashboard
Once the file is uploaded to your root web directory, click the “Verify File and Enable” button in your Sucuri dashboard. When the file has been verified, the scan will be queued on the monitor server and should complete in an hour or two.
If the PHP file is not in the correct location, then the scanner will not activate.
You will know if the file is not at the root of the site if you receive a warning such as “Error: Unable to find your site in the root directory” The PHP file should be in the root directory of your site (not the root directory of your server). This is often the public_html, www/var, httpdocs or similar directory where your index file is located.